Combining images
'feBlend'
The feBlend effect places one image on another. To do
this, it takes two images as parameters in and in2 then uses
the 'mode' attribute to decide how to combine pixels from the
images.
The simplest mode to understand is 'normal' which is the
default. Using 'normal' will cause pixels from the first to
be placed on top of those in the second. Any place where the
first image is transparent, the second image will show
through. This mode will get you a lot of mileage, if don't
know you need one of the other modes (multiply, screen,
darken, or lighten) then just use normal.
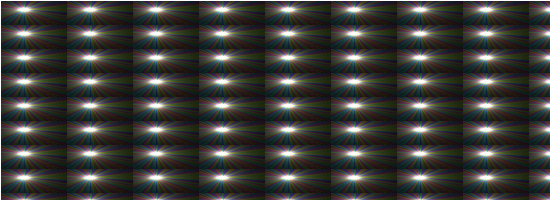
feBlend Example
<?xml version="1.0" standalone="no"?>
<!DOCTYPE svg PUBLIC "-//W3C//DTD SVG 1.1//EN"
"http://www.w3.org/Graphics/SVG/1.1/DTD/svg11.dtd">
<svg viewBox = "0 0 1100 400" version = "1.1">
<filter id = "i1">
<feImage x = "0" y = "0" width = "10%" height = "10%" result = "raster1" xlink:href = "../images/nova.png"/>
<feTile result = "tile1"/>
<feImage x = "0" y = "0" width = "50%" height = "50%" result = "raster2" xlink:href = "../images/sphere1.png"/>
<feBlend in = "raster1" in2 = "raster2"/>
</filter>
<g>
<rect x = "0" y = "0" width = "100%" height = "100%" filter = "url(#i1)"/>
</g>
</svg>
'feComposite'
The feBlend effect places one image on another. To do
this, it takes two images as parameters in and in2 then uses
the 'mode' attribute to decide how to combine pixels from the
images.
The simplest mode to understand is 'normal' which is the
default. Using 'normal' will cause pixels from the first to
be placed on top of those in the second. Any place where the
first image is transparent, the second image will show
through. This mode will get you a lot of mileage, if don't
know you need one of the other modes (multiply, screen,
darken, or lighten) then just use normal.
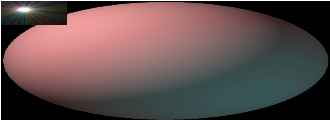
feComposite Example

<?xml version="1.0" standalone="no"?>
<!DOCTYPE svg PUBLIC "-//W3C//DTD SVG 1.1//EN"
"http://www.w3.org/Graphics/SVG/1.1/DTD/svg11.dtd">
<svg viewBox = "0 0 1100 400" version = "1.1">
<filter id = "i1">
<feImage x = "0" y = "0" width = "10%" height = "10%" result = "raster1" xlink:href = "../images/nova.png"/>
<feTile result = "tile1"/>
<feImage x = "0" y = "0" width = "50%" height = "50%" result = "raster2" xlink:href = "../images/sphere1.png"/>
<feComposite in = "raster1" in2 = "raster2"/>
</filter>
<g>
<rect x = "0" y = "0" width = "100%" height = "100%" filter = "url(#i1)"/>
</g>
</svg>
'feMerge'
The feBlend effect places one image on another. To do
this, it takes two images as parameters in and in2 then uses
the 'mode' attribute to decide how to combine pixels from the
images.
The simplest mode to understand is 'normal' which is the
default. Using 'normal' will cause pixels from the first to
be placed on top of those in the second. Any place where the
first image is transparent, the second image will show
through. This mode will get you a lot of mileage, if don't
know you need one of the other modes (multiply, screen,
darken, or lighten) then just use normal.
feMerge Example

<?xml version="1.0" standalone="no"?>
<!DOCTYPE svg PUBLIC "-//W3C//DTD SVG 1.1//EN"
"http://www.w3.org/Graphics/SVG/1.1/DTD/svg11.dtd">
<svg viewBox = "0 0 1100 400" version = "1.1">
<filter id = "i1">
<feImage x = "0" y = "0" width = "10%" height = "10%" result = "raster1" xlink:href = "../images/nova.png"/>
<feTile result = "tile1"/>
<feImage x = "0" y = "0" width = "50%" height = "50%" result = "raster2" xlink:href = "../images/sphere1.png"/>
<feMerge>
<feMergeNode in = "raster2"/>
<feMergeNode in = "raster1"/>
</feMerge>
</filter>
<g>
<rect x = "0" y = "0" width = "100%" height = "100%" filter = "url(#i1)"/>
</g>
</svg>